Let’s Encrypt
-시작
Let's Encrypt 프로젝트는 2012년 두 명의 모잘라 직원 Josh Aas, Eric Rescorla에 의해 시작되었으며 전자 프런티어 재단의 Peter Eckersley와 미시간 대학교의 J. Alex Halderman이 동참하였다. Let's Encrypt를 지원하는 기업 ISRG는 2013년 5월에 동참하였다.
Let's Encrypt는 2014년 11월 18일 공개 발표되었다
Let's Encrypt는 보안 웹사이트를 위한 인증서의 수동 생성, 유효성 확인, 디지털 서명, 설치, 갱신 등 종전의 복잡한 과정을 없애주는 자동화된 프로세스를 통해 전송 계층 보안(TLS) 암호화를 위해 무료 X.509 인증서를 제공하는 인증 기관이다. 2016년 4월 12일에 출범하였다
-운영주체
Let's Encrypt는 공익 기관 ISRG(Internet Security Research Group)에 의해 제공되는 서비스이다.
주요 스폰서들은 전자 프런티어 재단(EFF), 모질라 재단, OVH, 아카마이, 시스코 시스템즈가 있다. 그 밖의 파트너들로는 IdenTrust, 미시간 대학교, 스탠퍼드 법학대학원, 리눅스 재단, Raytheon/BBN 테크놀로지스의 Stephen Kent, 코어OS의 Alex Polvi가 포함된다.
출처 : https://ko.wikipedia.org
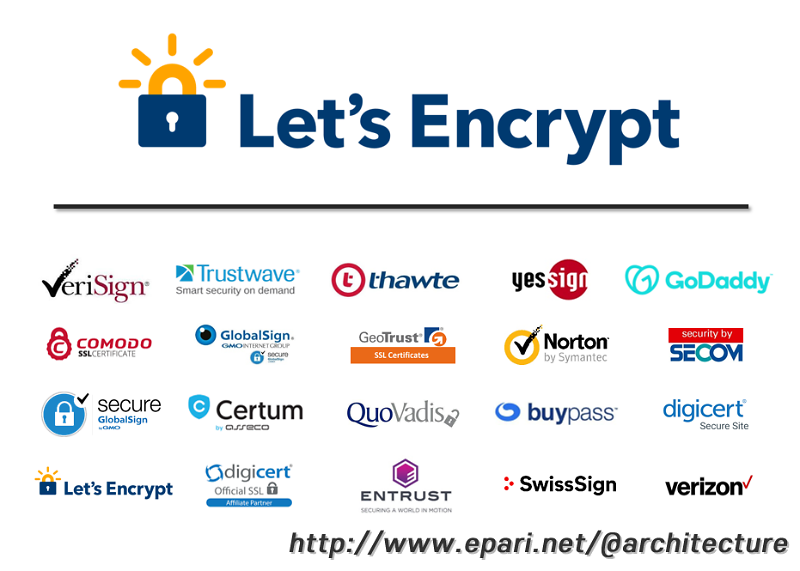
Let’s Encrypt는 다른 CA(Certificate Authority)업체 중이 하나입니다
다른 CA(인증기관)들은 유료로 비싼 가격에 설치관리가 복잡한한것에 비해, Let’s Encrypt는 무료이면서 설치가 쉽고 관리를 자동화 할수 있는 장점이 있다.
이것이 인터넷 보안에 문제가 있다는 문제 의식하에 무료 보급을 통한 인터넷 보안을 강화하겠다는 Let’s Encrypt의 취지 이다.
Let’s Encrypt SSL 인증서는 다음과 같은 장접이 있다.
- 인증 절차가 단순(명령어 하나로 간단히 발급 가능)
- 발급 대기 시간 없이 바로 발급(이메일/도메인 입력만으로 발급 가능)
- Nginx나 아파치와 같은 웹서버에 맞추어 자동 옵션 설정되도록 설치 가능(crontab)
- 인증 유효기간은 90일이지만 인증을 자동화 가능(crontab)
- 무료이다
[4]. SSL 인증서(letsencrypt) 발급
1. 공식 사이트 : 렛츠인크립트(Let's Encrypt)
URL : https://letsencrypt.org
2. 패키지 사용 준비
- 패키지 다운로드
[root@localhost local]
[root@localhost local]
[root@localhost local]
- 실행 권한 추가
[root@localhost letsencrypt]# chmod a+x certbot-auto
[root@localhost letsencrypt]# chmod a+x letsencrypt-auto
3. 인증서 발급 방법
- 인증서 발급은 사이트에서 인증기관인 Let’s Encrypt에 접속해 이 사이트의 유효성을 검증하는 과정을 거처 발급 받는다
- apache : 인증 및 설치를 위해 Apache 플러그인 사용(웹서버에서 직접 SSL 인증을 실시하고 웹서버에 맞는 SSL세팅값을 부여)
발급이나 갱신을 위해 웹서버를 중단시킬 필요가 없음
인증서 갱신 시 상황에 맞게 세팅을 자동으로 업데이트
사용자가 세팅을 변경할 수 있지만 자동 업데이트 시 반영되지는 않음
- nginx : 인증 및 설치를 위해 Nginx 플러그인 사용(웹서버에서 직접 SSL 인증을 실시하고 웹서버에 맞는 SSL세팅값을 부여)
발급이나 갱신을 위해 웹서버를 중단시킬 필요가 없음
인증서 갱신 시 상황에 맞게 세팅을 자동으로 업데이트
사용자가 세팅을 변경할 수 있지만 자동 업데이트 시 반영되지는 않음
- standalone : 인증을 위해 독립형 웹 서버 실행 (웹서버 중지하고 네트워크를 통한 사이트 유효성을 확인해서 SSL인증서를 발급받는 방식)
80포트로 가상 standalone 웹서버를 띄워 인증서를 발급
이 방식은 동시에 여러 도메인을 발급 받을 수 있음
그렇지만 인증서 발급 전에 웹서버를 중단하고 발급 완료 후 다시 웹서버를 시작해야 함
- webroot : 인증을 위해 서버의 webroot 폴더에 파일을 배치합니다.(사이트 디렉토리 내에 인증서 유효성을 확인할 수 있는 파일을 업로드하여 인증서를 발급하는 방법)
실제 작동하고 있는 웹서버의 특정 데렉토리의 특정 파일 쓰기 작업을 통해서 인증
이 방식의 장점은 nginx를 중단시킬 필요가 없음.
이 방법의 단점은 인증 명령에 하나의 도메인 인증서만 발급 가능
- manual : 대화식으로 또는 셸 스크립트를 사용하여 인증서 얻기
- DNS : 도메인을 쿼리해 확인되는 TXT 레코드로 사이트 유효성을 확인하는 방법
와일드 카드 방식으로 인증서를 발급 가능
이 방법은 당연하게도 서버 관리자가 도메인 DNS를 관리/수정할 수 있어야 하며
인증서 갱신 시마다 DNS에서 TXT값을 변경해야 하므로 외부에서 TXT 레코드를 입력할 수 있도록 DNS가 API를 제공하는 경우만 갱신 과정을 자동으로 처리(클라우두플레어 API가 대표적인 사례)
4. standalone 모드로 인증서 발급 및 설치 진행
(1). 설치 및 인증서 발급
- web서버 중지
[root@localhost letsencrypt]# systemctl stop httpd.service
- 인증서 발급/설치
[root@localhost letsencrypt]# ./letsencrypt-auto certonly
Bootstrapping dependencies for RedHat-based OSes... (you can skip this with
yum is /usr/bin/yum
yum is hashed (/usr/bin/yum)
Loaded plugins: langpacks, product-id, search-disabled-repos, subscription-manager
This system is not registered with an entitlement server. You can use subscription-manager to register.
Package gcc-4.8.5-16.el7.x86_64 already installed and latest version
Package augeas-libs-1.4.0-2.el7.x86_64 already installed and latest version
Package 1:openssl-1.0.2k-8.el7.x86_64 already installed and latest version
Package 1:openssl-devel-1.0.2k-8.el7.x86_64 already installed and latest version
Package redhat-rpm-config-9.1.0-76.el7.noarch already installed and latest version
Package ca-certificates-2017.2.14-71.el7.noarch already installed and latest version
No package python-tools available.
Package 1:mod_ssl-2.4.6-67.el7.x86_64 already installed and latest version
Resolving Dependencies
Dependencies Resolved
================================================================================================================================================
Package Arch Version Repository Size
================================================================================================================================================
Installing:
libffi-devel x86_64 3.0.13-18.el7 ISO-repository 23 k
python-devel x86_64 2.7.5-58.el7 ISO-repository 395 k
python-virtualenv noarch 1.10.1-4.el7 ISO-repository 1.2 M
python2-pip noarch 8.1.2-6.el7 epel 1.7 M
Transaction Summary
================================================================================================================================================
Install 4 Packages
Total download size: 3.3 M
Installed size: 9.8 M
Downloading packages:python2-pip-8.1.2-6.el7.noarch.rpm | 1.7 MB 00:00:03
Total 1.0 MB/s | 3.3 MB 00:00:03
Running transaction check
Running transaction test
Transaction test succeeded
Running transaction
Installing : python-devel-2.7.5-58.el7.x86_64 1/4
Installing : python-virtualenv-1.10.1-4.el7.noarch 2/4
Installing : python2-pip-8.1.2-6.el7.noarch 3/4
Installing : libffi-devel-3.0.13-18.el7.x86_64 4/4
Verifying : python-virtualenv-1.10.1-4.el7.noarch 1/4
Verifying : python-devel-2.7.5-58.el7.x86_64 2/4
Verifying : libffi-devel-3.0.13-18.el7.x86_64 3/4
Verifying : python2-pip-8.1.2-6.el7.noarch 4/4
Installed:
libffi-devel.x86_64 0:3.0.13-18.el7 python-devel.x86_64 0:2.7.5-58.el7 python-virtualenv.noarch 0:1.10.1-4.el7 python2-pip.noarch 0:8.1.2-6.el7
Complete!
Creating virtual environment...
Installing Python packages...
Installation succeeded.
Saving debug log to /var/log/letsencrypt/letsencrypt.log
Plugins selected: Authenticator standalone, Installer None
Obtaining a new certificate
Performing the following challenges:
http-01 challenge for myweb.com
Cleaning up challenges
Problem binding to port 80: Could not bind to IPv4 or IPv6.
IMPORTANT NOTES:
- Your account credentials have been saved in your Certbot
configuration directory at /etc/letsencrypt. You should make a
secure backup of this folder now. This configuration directory will
also contain certificates and private keys obtained by Certbot so
making regular backups of this folder is ideal.
- Web서버 시작
[root@localhost letsencrypt]# systemctl start httpd.service
(2). 인증서 설치 위치
- 인증서 설치 위치 : /etc/letsencrypt
- 인증서 확인 위치 : /etc/letsencrypt/live/myweb.com
(3). 옵션 설명
certonly : 인증서만을 얻어오겠음
standalone : standalone모드로 실행
email : 관리자 이메일
d : 인증서를 생성할 도메인을 지정
agree-tos : 대화형 모드 yes/no에서 무조건 (yes)로 처리함
(4). 인증서 발급 애러
- 특정 유형의 요청을 너무 많이 한 경우 (There were too many requests of a given type :: Error creating new order :: too many failed authorizations recently: see https://letsencrypt.org/docs/rate-limits/)
[root@localhost letsencrypt]# ./letsencrypt-auto certonly --standalone --email admin@myweb.com -d myweb.com --agree-tos
Saving debug log to /var/log/letsencrypt/letsencrypt.log
Plugins selected: Authenticator standalone, Installer None
Obtaining a new certificate
An unexpected error occurred:
There were too many requests of a given type :: Error creating new order :: too many failed authorizations recently: see https://letsencrypt.org/docs/rate-limits/
설명 : SSL 발급 요청을 너무 많이 했는데 모두 유효하지 않은 요청이라 악의적이라 판단해서 해당 도메인에 대해 발급 요청이 일시 중단된 상태이다(1시간 가량 기다린 후에 다시 진행 해야함)
5. 여러개 도메인의 인증서를 발급 하는 방법
(1). (여러개 도메인) 각각 별도로 인증 발급
- 인증서 발급
[root@localhost letsencrypt]
[root@localhost letsencrypt]
[root@localhost letsencrypt]
- 인증서 결과 (인증서 3개 디랙토리 각각 생성)
[root@localhost letsencrypt]# cd /etc/letsencrypt/live
[root@localhost letsencrypt]# ls
myweb.com www.myweb.com test.myweb.com
(2). (여러개 도메인) 메인 도메인에 서브 도메인을 묶어서(체인) 인증서 발급
- 인증서 발급
[root@localhost letsencrypt]# ./letsencrypt-auto certonly --standalone --email admin@myweb.com -d myweb.com -d www.myweb.com -d test.myweb.com --agree-tos
또는
[root@localhost letsencrypt]# ./letsencrypt-auto certonly --standalone --email admin@myweb.com --cert-name myweb.com -d www.myweb.com -d test.myweb.com --agree-tos
또는
[root@localhost letsencrypt]# ./letsencrypt-auto certonly --standalone --email admin@myweb.com --cert-name myweb.com -d myweb.com -d www.myweb.com -d ko.myweb.com -d en.myweb.com -d ja.myweb.com --agree-tos
※ 체인명과 도메인명이 동일한경우(-d myweb.com) : --cert-name myweb.com -d myweb.com
- 인증서 결과 (메인 도메인 1개로 묶어서 생성)
[root@localhost letsencrypt]# cd /etc/letsencrypt/live
[root@localhost letsencrypt]# ls
myweb.com
(3). (여러개 도메인)기존 메인 도메인에 (체인)도메인 추가 인증서 발급
- 인증서 발급
[root@localhost letsencrypt]# ./letsencrypt-auto certonly --standalone --email admin@myweb.com --cert-name myweb.com -d deve.myweb.com --agree-tos
- 인증서 결과 (메인 도메인 1개로 묶어서 생성)
[root@localhost letsencrypt]# cd /etc/letsencrypt/live
[root@localhost letsencrypt]# ls
myweb.com
6. 인증서 삭제
- 특정 도메인 인증서 삭제
[root@localhost letsencrypt]# ./certbot-auto delete --cert-name test.myweb.com
- 메인 도메인 (체인) 전체 삭제
[root@localhost letsencrypt]# ./certbot-auto delete --cert-name myweb.com
7. 인증서 갱신
(1). 인증서 갱신
[root@localhost letsencrypt]# ./letsencrypt-auto renew --no-self-upgrade
(2). 인증서 갱신 테스트(실제 갱신은 안하고 테스트만 진행)
[root@localhost letsencrypt]# ./letsencrypt-auto renew --no-self-upgrade --dry-run
(3). 자동 갱신(crontab) : Let’s Encrypt는 90일 마다 인증서 갱신을 해줘야한다. (만약에 인증서 갱신 주기가 각각 다른 도메인을 가지고 있다면 1달 간격으로 무조건 갱신을 하면 된다)
[root@localhost letsencrypt]
0 3 30 * * root /bin/bash -l -c /usr/local/daemonManager/ssl_letsencrypt_renew.sh >> /var/log/letsencrypt/le-renew_$(date +\%Y\%m\%d).log
(3). ssl_letsencrypt_renew.sh 작성
#!/bin/sh
systemctl stop httpd.service
su - root << EOF
cd /usr/local/letsencrypt/
./letsencrypt-auto renew --no-self-upgrade >> /var/log/letsencrypt/le-renew_$(date +\%Y\%m\%d).log # renew
echo "SSL RENEW..."
EOF
systemctl start httpd.service
8. Apache SSL 설정 하기
- ssl 설정파일 수정 : /etc/httpd/conf.d/ssl.conf
<VirtualHost _default_:443>
DocumentRoot "/home/jboss/EAP-7.1.0/SERVER11/deployments/MYWEB.war"
ServerName myweb.com
ServerAlias www.myweb.com
SSLEngine on
SSLProtocol all -SSLv2
SSLCipherSuite ALL:!ADH:!EXPORT:!SSLv2:RC4+RSA:+HIGH:+MEDIUM:+LOW
SSLCertificateFile /etc/letsencrypt/live/myweb.com/cert.pem
SSLCertificateKeyFile /etc/letsencrypt/live/myweb.com/privkey.pem
SSLCertificateChainFile /etc/letsencrypt/live/myweb.com/chain.pem
SSLCACertificateFile /etc/letsencrypt/live/myweb.com/fullchain.pem
JkMountFile conf.d/uriworkermap.properties
JkMount /* wlb_common
<Files ~ "\.(cgi|shtml|phtml|php3?)$">
SSLOptions +StdEnvVars
</Files>
<Directory "/var/www/cgi-bin">
SSLOptions +StdEnvVars
</Directory>
LogLevel warn
ErrorLog logs/ssl_myweb.co.kr-error_log
CustomLog logs/ssl_myweb.co.kr-access_log common env=!dontlog
</VirtualHost>